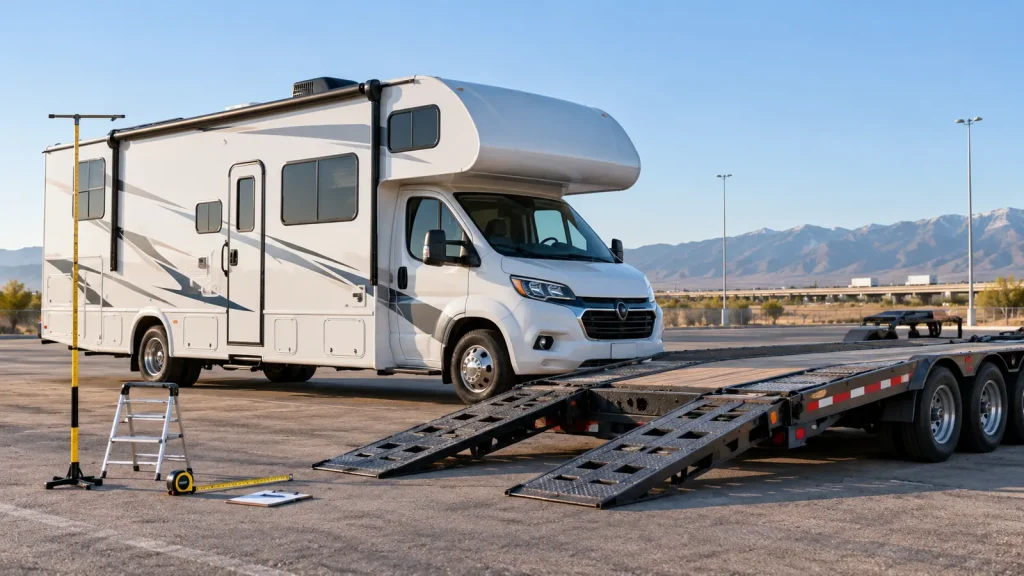
Shipping an RV across the country starts well before pickup day. Motorhomes, travel trailers, fifth wheels, campers and toy haulers vary widely in size, condition and loading requirements, so a useful transport plan depends on accurate details rather than a one-size-fits-all checklist.
This guide explains what to gather before requesting a quote, what to confirm once a transport method is selected and how to document the RV at pickup and delivery. For service details and equipment eligibility, see our RV transport service page.
1. Identify the RV type and configuration
Start with the exact RV type, year, make and model. A Class A motorhome, Class C motorhome, fifth wheel and bumper-pull travel trailer may need very different handling. Also note any permanent or added equipment that changes the unit’s profile, including roof air conditioners, satellite equipment, ladders, spare-tire carriers, bike racks, cargo platforms or aftermarket bumpers.
Do not rely only on a brochure model name. Trim packages and owner-installed accessories can change the dimensions that matter for routing and equipment selection.
2. Measure the complete exterior
Provide the overall length, width and height at the RV’s actual widest and highest points. Measure length from the furthest forward point to the furthest rearward point, including a hitch, ladder, spare tire or cargo carrier when those items will remain attached. Width should include fixed mirrors or awning housings. Height should include rooftop air conditioners, antennas and other permanent equipment.
Weight matters too. Use the manufacturer label, registration, certified scale ticket or another reliable record when available. Do not guess. A quoted dry weight may not reflect installed options, fluids or personal property.
If the unit approaches oversize dimensions, route constraints can affect the plan. Our oversize-load route planning checklist explains why clearances, restrictions and permits may need to be reviewed before dispatch.
3. Describe operating condition honestly
For a motorized RV, state whether it starts, runs, steers and brakes under its own power. Mention warning lights, fluid leaks, low ground clearance, air-suspension issues, damaged tires or anything that could affect loading. A unit that “ran last season” should not be presented as currently operational unless it has been checked.
For a towable RV, describe the hitch or coupler, tires, wheel bearings, brakes, lights and jack condition. If a travel trailer or fifth wheel is not roadworthy, say so before the equipment is assigned. Also disclose collision damage, stuck slide-outs, locked wheels or missing keys.
These details do not automatically prevent transport. They help determine whether tow-away, drive-away or trailer-based service may be appropriate. Availability depends on the RV, route, access and current carrier equipment.
4. Check pickup and delivery access
A large RV needs more than a street address. Tell the coordinator whether each location is residential, commercial, at a campground, storage facility, repair shop or auction. Note gate hours, check-in rules and any appointment requirement.
Review the approach for low branches, wires, narrow gates, steep grades, soft ground, tight turns and limited backing space. A long trailer may not be able to enter a location that the RV reached on its own. If access is uncertain, identify a nearby legal, level meeting point with enough room for safe loading or transfer. Do not assume a shoulder or retail parking lot can be used without permission.
5. Prepare after the transport method is confirmed
Preparation instructions can vary, so follow the confirmed carrier or coordinator guidance rather than disconnecting systems prematurely. In general, retract and secure slide-outs, awnings, antennas and steps. Close and latch doors, windows and exterior compartments. Remove loose items that could shift, and secure anything approved to remain inside.
Ask how fuel, propane, batteries, water and other utilities should be handled for the selected method. If an appliance, generator or leveling system has a known problem, disclose it. Keep required keys, manuals and access codes together for the authorized pickup and delivery contacts.
6. Record the RV’s condition
Take clear, time-stamped photos shortly before pickup. Photograph all sides, the roof when it can be done safely, glass, mirrors, tires, corners and any existing damage. Include close-ups and wider images that show where each mark is located. Avoid relying on an old listing or dealership photo.
At pickup, review the condition report or bill of lading before signing. Confirm that the RV identification details and noted exceptions are accurate. Keep a copy of the signed document and the photo set until delivery is complete.
7. Understand what changes the quote
Cross-country RV transport pricing can vary with mileage, origin and destination access, dimensions, weight, operating condition, transport method, route restrictions, season and scheduling flexibility. A quote based on incomplete measurements may need to be revised once the actual unit is reviewed.
For a useful estimate, provide the exact pickup and delivery locations, RV type, full dimensions, approximate weight, condition, preferred timing and access notes. Photos can help clarify attachments, damage and loading considerations.
8. Plan the delivery handoff
Confirm the receiver’s name and phone number before dispatch. The receiver should be available during the agreed delivery window and able to inspect the unit. At delivery, compare the RV with the pickup photos and condition report before signing. Note any new concern on the delivery document and take photographs while the carrier is present.
Request an RV transport quote
If you are planning a cross-country RV move, gather the measurements and condition details above, then request a transport quote. Elevation Transport Services can review the unit, route and access information to help identify an appropriate transport plan. Service and timing remain subject to the RV details, route and carrier availability.